Thursday, January 29, 2009

Metal Curves

Here’s my image for today, following along in my series of photos of things from around my house.

This photo was taken as three images, bracketed 2 stops apart and processed as an HDR image in PhotoMatix Pro. I used my Sigma Macro 105mm lens, mounted on my tripod, f8, shutter somewhere between 1/15 and 1/250 seconds. After processing in PhotoMatix, it was brought back into Lightroom and converted to monochrome.

I dislike the two hotspots on this image but could not fix them to my liking so left them as they were. I need to learn more about proper lighting technique to diminish these in future shots.

What’s your guess as to what this is? Leave me a comment below! At the end of a week’s worth of images, I will reveal the identity of each item.

Wednesday, January 28, 2009

Cross Process

Here’s my image for today, following along in my series of photos of things from around my house.


Like my previous photo, this image was supposed to be taken as three images but my card filled up on the second of the three so that is where I stopped! The shots were bracketed 2 stops apart and processed as an HDR image in PhotoMatix Pro. I used my Sigma Macro 105mm lens, mounted on my tripod, f8, shutter somewhere between 1/30 and 1/3 seconds. After processing in PhotoMatix, it was brought back into Lightroom for further processing where I added a preset called Cross Process – Alan’s Custom from a set of presets downloaded from Inside Lightroom. They have some really nice presets and they are FREE so go get some for yourself!


What’s your guess as to what this is? Leave me a comment below! At the end of a week’s worth of images, I will reveal the identity of each item.

Tuesday, January 27, 2009

Everything But the Kitchen Sink

I have decided to take a theme approach to my picture taking for the next little while. I will be photographing things around the house. You’re thinking, “BORING!” My job, then, is to be as creative as possible in my picture taking so that I can make everyday objects look interesting! I am hoping that I can excel at this challenge, and who knows, my kitchen sink may just show up in one of my images!


Here is one for today:


This photo was taken as three images, bracketed 2 stops apart and processed as an HDR image in PhotoMatix Pro. I used my Sigma Macro 105mm lens, mounted on my tripod, f8, shutter somewhere between 1/45 and 1/3 seconds. After processing in PhotoMatix, it was brought back into Lightroom and converted to monochrome.


What’s your guess as to what this is? Leave me a comment below! At the end of a week’s worth of images, I will reveal the identity of each item.

Monday, January 26, 2009

Blend If

Have you ever wanted to replace a sky in a photo? You may have taken the perfect photo but the sky just wasn’t overly dramatic and you wanted to make the overall photo look better. I have done this before, using a very painstaking method of selecting the sky and doing a lot of masking and feathering, etc.


Until TODAY!


Today I came across a brilliant tutorial for replacing the sky in a photo using the Blend If parameters on the layer styles dialog in Photoshop. Unfortunately, this will not work in Photoshop Elements because Blend If does not exist.


Now I have known about Blend If for some time but have never really used it until seeing this tutorial by Helen Bradley.


I was quickly able to blend these two images:


church


sky


I used these settings:


image


This is what the image looked like before I added a layer mask:


image


This is what my masking looked like (to cover up areas that were revealed while using Blend If):


image


This is my final result:


image


It should be noted that in the tutorial by Helen, she suggests using the burn tool to get rid of any halos around tree branches, etc. I did not do this but found I was able to remove the haloing by increasing the split of the black slider.


Including masking, the entire process took me less than 5 minutes to complete! I am sure you will agree that this will be an invaluable technique to add to your Photoshop arsenal!

I thought it might be interesting to find out a little more about using Blend If so I dug up these tutorials for you:


Advanced Layers Blending: The Blend If Parameters This tutorial by Panos shows how using Blend If can help with montaging a moon image into a scene.


Photoshop Advanced Blending – Blend If Steve Patterson details how to use Blend If to blend writing onto a brick wall to make it look like graffiti written on a wall.


Misunderstood Photoshop: Blend If This is another tutorial by Helen Bradley that not only details replacing a sky but how to knock the background from an image. The latter technique would be excellent for knocking out the background after scanning an object. In her example, Helen uses lace. Clicking on the second part of the tutorial will help to explain what it is that the sliders are doing.


I hope that you will enjoy exploring these tutorials! Drop me a comment below if you get the chance to try them.

Thursday, January 22, 2009

High Dynamic Range Imaging (HDRI)

Today, instead of taking a few shots I decided to process some Raw images that I took on a weekend at Riding Mountain National Park in September 2004. At that time, I did not know about HDRI but I did know that by taking several shots at different exposures, I could later blend those photos pleasingly using Photoshop.


I have since purchased Photomatix Pro and have been experimenting with the processing of images using it and Lightroom together.


I used four raw photos to produce my final image:


f8, 1/500

hdr_input-0639


f8, 1/1250

hdr_input-0641


 f16, 1/1250

hdr_input-0642


f22, 1/2500
hdr_input-0644


You will notice that along the way, I switched not only shutter speeds but f-stops. Not sure why I did this but this is NOT the way to do it! When taking a series of images for HDR processing, you usually set your camera to Aperture Priority and take your initial shot. You then take bracketed shots both under and over that setting. If the dynamic range is great, it is best to take 5 to 7 shots, one stop apart. For some photos, you can get away with three bracketed shots.


I then exported these photos from Lightroom (I did not process them in Lightroom first) into Photomatix Pro where I used Tone Mapping to process them. When I finished, I imported the final image back into Lightroom for some finishing touches – saturation, curves, and the addition of a vignette. Here is the result:


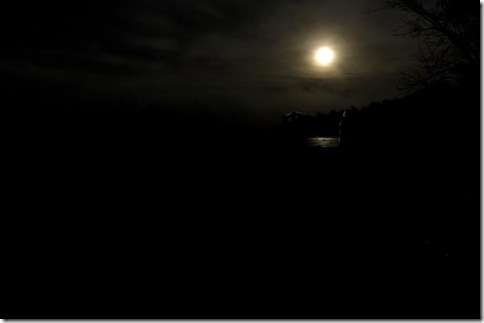
Sunrise at Lake Audy

hdr_0639


I like the moodiness of this image and I am pleased at what I was able to accomplish!


If you would like to know more about taking photos for HDR processing as well as processing them using Photomatix Pro, Tony Sweet has some great tutorials on YouTube.

Wednesday, January 21, 2009

Fog and Frost

A photographer’s dream day was what I awakened to today! The fog was so thick you couldn’t see six feet in front of your car!


I had never taken any fog shots before so though I was on my way to do errands in the city, I took along my camera and tripod hoping to stop and get some shots along the way.


First on my list of priority shots was to get a bridge in the fog. I took a look at the Lockport Bridge first but couldn’t find a location in which to setup to take the shot! I next thought about the Bridge to Nowhere on Highway 4 so set off in search of it down Highway #59. Simply amazing fog enveloped my car as I made my way down the highway but unfortunately, the fog dissipated as I got closer and closer to my destination!


Change of plans . . . I turned around and headed for the bridge into Selkirk. Well, the fog was not there either! Totally bummed out, I stopped near the riverbank to take some close-ups of hoar frost-covered weeds and branches. I then made my way toward the city, stopping once again to take a few scenics of a hoar frost-covered bush with a fence in the foreground.


After I got home and was able to process my shots, I was very disappointed with what I had taken! Though a few of my weed shots were ok, I should have used a smaller aperture to keep more of the weeds in focus throughout the shot. Then, looking at my landscapes, I discovered I had made horrible compositional mistake – the horizon was dead centre through the image! I tried cropping to improve things but still could not end up with a decent shot!


So here are only two shots that I can present to you . . . certainly not my best work but hopefully, this will be a learning experience and next time round, I will not repeat the same mistakes!


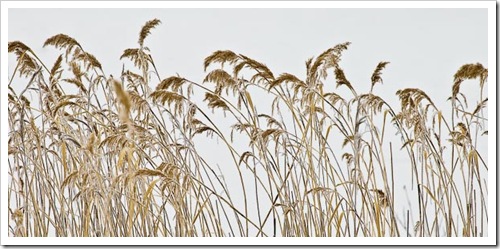
The following shots were taken with my 80-200 lens, f8.


Frosty Weeds

Frosty Weeds


Weeds in Winter

Weeds in Winter

Sunday, January 18, 2009

Snow Shoot!

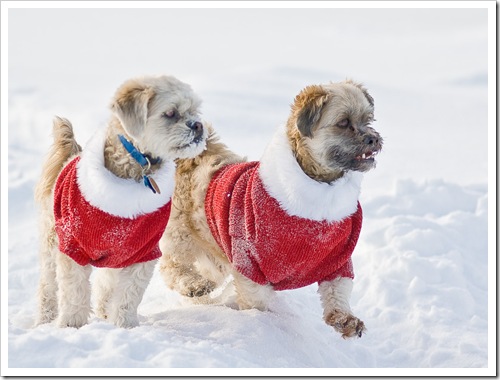
Finally, some weather that doesn’t make you want to pull the covers over your head and stay in bed until winter ends! With the thermometer climbing to –4C today from the –50C temperatures we had last week, I thought this was great time to get some shots of the dogs outside in the snow.


I dressed them in the red sweaters they had received for Christmas and headed outside with my 80-200mm lens on my camera.


My plan was to lay down on a tarp and have the dogs running towards me after my husband released them. It quickly became apparent that this would not work for a number of reasons.


1. The dogs would not run together.

2. The dogs ran too fast.

3. The dogs would not run in a straight line toward me.

4. It was hard to focus, even when pre-focusing on the spot I wished to snap the photo.


Time for plan B!


A recent visitor with a snowmobile had carved a circle in our otherwise pristine, snow-filled yard. This provided a good place to throw biscuits and snap shots of the dogs!


Here is a sampling of some I shot using ISO 200, f2.8, and between 1/1500 and 1/4000 seconds. They were all processed in Lightroom 2. I also tried jacking my exposure compensation to +1 (to expose properly for the snow) for some of the shots even though my camera seemed to think they were overexposed and showed lots of blinkies! When I got them into Lightroom, they were not overexposed and the overall exposure was much better than the others I had taken.


Brandy


Brandy


Bailey


Bailey


Brandy & Bailey


Brandy & Bailey


And finally my favorite shot from the day . . .


Bailey & Brandy Looking for More Biscuits!


Bailey & Brandy


What would I do differently next time? Take more photos and use different apertures. I love f2.8 but to get more of the dogs in focus and to get them BOTH in focus when they are together will require a smaller aperture.

Tuesday, January 13, 2009

Scrapbooking Day

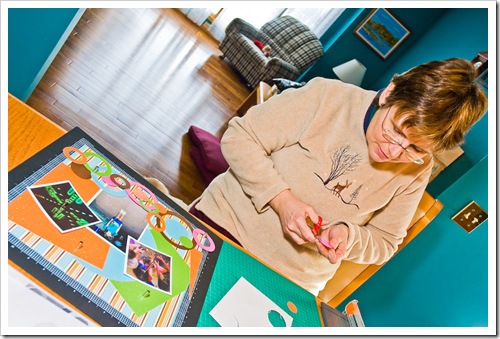
My friend, Charlene and I got together for our monthly scrapbooking session at my house today. I was able to catch a few shots of her in action.


Scrapbooking


I like the angle of this one – it seems more dynamic to me when there is a bit of an angle. This shot was taken using my 18-70mm kit lens, at 400 ISO, f5.6 at 1/60 sec. I used my SB-800 flash outfitted with a Gary Fong Lightsphere which you can find at Henry’s. This was my Christmas present to myself this year and it has really made a big difference with my flash pictures.

Monday, January 12, 2009

My Addiction

So today I will introduce you to my addiction . . .


My Addiction


Anyone who knows me well will tell you that I LOVE coffee! I love the smell, the taste, the texture of the beans, the sound of the coffee grinder and the drip of the brewing coffee. I love the process of making the coffee . . . putting a filter in the coffee maker, grinding the beans, adding the water, turning on the coffee maker and finally viewing the results! What a wonderful way to start my day!


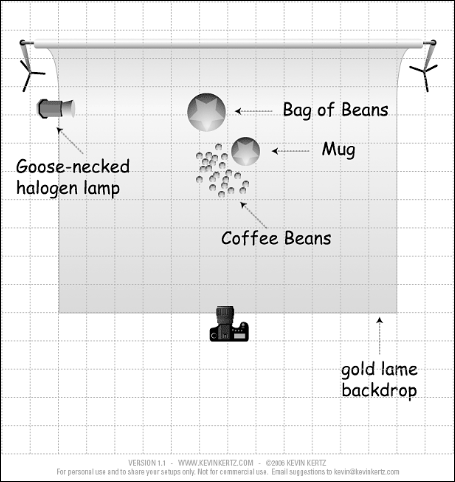
For this shot, I used a piece of gold lame fabric to form my backdrop. It was draped over the DIY light box I mentioned yesterday. I tried to form some interesting folds at the back but found out that the bottom had to look smooth or the shot looked weird.


I set my camera up on a tripod and composed the image, making use of my 105mm macro lens. I then worked at laying out my coffee still life. I placed my empty glass cup first, then the loose beans, and finally the bag of coffee beans. I placed one small goose-necked halogen lamp to the left of the setup. I tried a series of shots at different apertures and shutter speeds to get a feel for what would produce the best image.


Here is what my lighting setup looked like for this shoot:


Lighting Setup for Coffee Shoot


For this particular image, I bracketed my shots . . . f5.6 at 1/6, 1/20, and .7 seconds. I combined the images in PhotoMatix Pro to form the resulting HDR image. I then imported the completed image into Lightroom 2 for further editing. I used a preset called Center Stage which I modified slightly and applied some vignetting to the edges to focus the attention on the mug of coffee and produce this final image.


Though I like this image, I will definitely play with coffee shots in the future. The lame may not have been the best choice for a backdrop because it produces some very blown hotspots but I do think it helped me achieve a warm and inviting look for the image which is what I was after. I also like the monochromatic look of it.


What’s YOUR addiction? Photograph it and link me up by leaving me a comment below!

Sunday, January 11, 2009

The Start of a New Year!

So, it has now been 2009 for 11 days and I figured it was time to devote more of my energy and creativity to photography. Though I have been a member of the Manitoba Camera Club since 2003, I have not been really active with a camera for the past two years, other than snapping the odd backyard photo, Christmas snaps, etc. to provide me with fodder for my digital scrapbooking.


I have decided that 2009 will be the year that I get back into the swing of things, photographically speaking. To aid in this venture, I have decided to try the Picture a Day project (PAD). Now, I have already missed some days but I have taken more pictures in this past week than I have for months so I am still viewing this as a good thing!


I plan to use this blog to post my daily (give or take a few days!) photo as well as to supply you with some commentary on the images and how I took them and post-processed them. I would also like to provide you with some helpful links to photography articles, blogs, and anything else I find that may aid you in your own challenge to improve your photography.


So, to start things off, here are the photos I have taken so far this year (all images are clickable and will link you to a larger size)  . . .
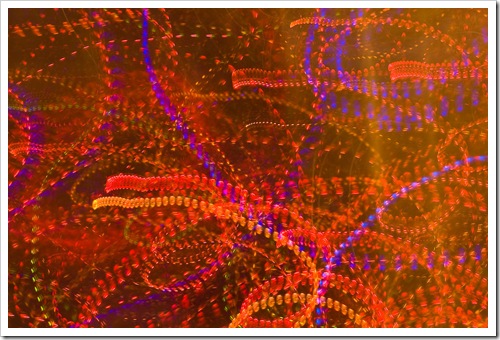
 

 Christmas Lights Abstract


A lot of my first photos will include some sort of reference to Christmas. I love Christmas and hate to take our decorations down in January! This photo was a shot of the lights on our tree. To achieve this image, I used my 50mm lens at f8, 6 seconds and moved the camera around while taking the shot. I took several different pictures like this, changing the type of movement each time – circles, horizontal, vertical, diagonal, zigzag, etc. Though I got some other images with parts that I liked, the entire image did not contain the best composition and could not be cropped successfully into a shot that I liked. Shooting digitally is certainly advantageous in situations like this! If you would like to explore this technique (especially if you hate using a tripod!) you should check out the article,  Painting with Shutter Speed.
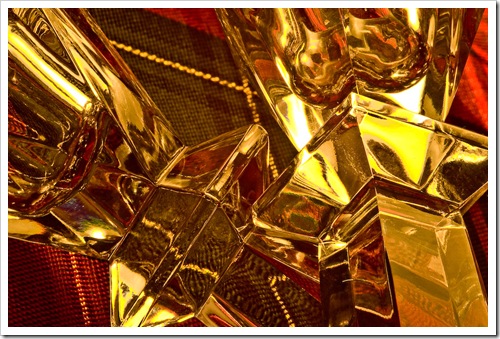


Candlesticks Abstract


Due to the frightening cold snap we have been experiencing, most of my shots during the winter are taken inside. This allows me to experiment with still life and abstract macro shots. For this shot, I arranged two crystal candlesticks on top of a plaid Christmas tablecloth. I used a goose-necked halogen lamp to shine from the left of the candlesticks. During the shot, to diffuse the light and thus produce a better result on the crystal, I held a white translucent panel between the light and the candlesticks. To do this, I set my camera so that I could trip the shutter with the remote control. I set up my 105mm macro lens on my tripod and tried several different shots at different distances and compositions. For this one I used f22 at 4 seconds. Since I am not a pro photographer, I don’t have a budget for a lot of fancy lights and strobes. If you would like to experiment with lighting setups but don’t want to invest a lot of money, may enjoy reading the following: Putting Together a Budget DIY Lighting System and a series of pictures and accompanying text to help you put together and use your own Light Box. If you prefer a book, you may want to check out Low Budget Shooting: Do It Yourself Solutions to Professional Photo Gear by Cyrill Harnischmacher. Other books on general lighting for still life shots may give you further info.
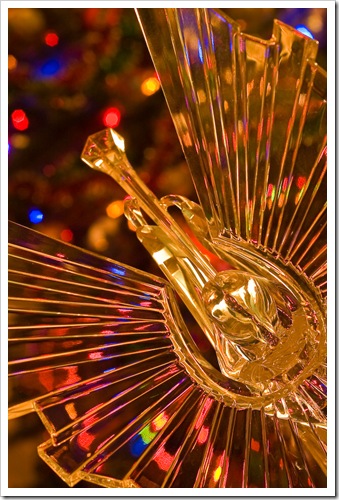
 

Bokeh Abstract


On the Pioneer Woman’s website, I saw an intriguing article on bokeh. This encouraged me to test my own lens with the lights on our tree. To make the shot more interesting, I placed a lucite angel on a stool about five feet in front of the tree. Using a tripod, I set up my camera using my 50mm lens, f8 at 4 seconds. I tried several different shots using different apertures (bokeh looks much different depending on both the chosen aperture and the distance of the lens from the light source) and composition. I liked this shot the best.
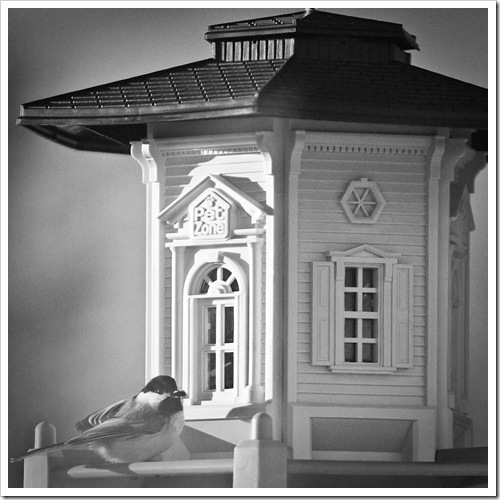


Chickadee


For his birthday, I presented my husband with a new bird feeder in hopes that we might actually view some birds close up during the winter. At long last, the chickadees discovered the feeder but they would not allow me to photograph them! I positioned my tripod and camera and held my remote control but the birds would not come! After several days of this “bird and mouse” game, I was able to capture a couple of shots that I liked! This image was taken using my 80-200mm lens, f2.8 at 1/2000 seconds. I processed the shot in Lightroom 2 (where I do all my processing now) and I liked this b/w version the best.
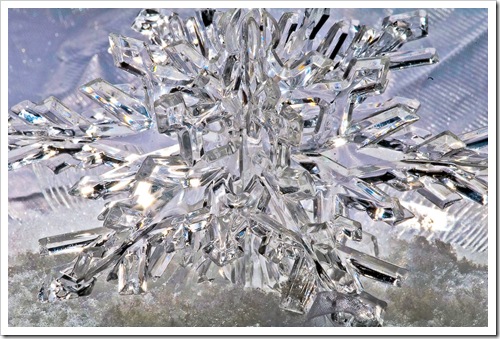


Snowflake in Snow


In a photography book I recently purchased – Photo Idea Index – I saw a shot of a cell phone lying in snow. This gave me the idea to try some shots of various items in some fake snow that I had lying around the house. This is a 3D lucite  snowflake tree ornament placed on top of some fake snow. For the background, I used a white reflector. The shot was processed as an HDR (High Dynamic Range) photo using PhotoMatix Pro and then brought back into Lightroom 2 for further processing. The three necessary shots were taken with my 105mm macro lens at f32 and were bracketed for 1/8 , 1/30, and 1/2 seconds. For more information on HDR photography, you can check out these links.

You may also choose to view some stunning HDR photos.


Well, that’s all for today! I would love to hear from you about your own photographic explorations . . . leave me a comment below.

Monday, January 5, 2009

favicon